
1. Preparing Metrology Measurements for Morpheus™
Introduction
Morpheus™ is built to quickly and easily process metrology data from measurements of a test optic made using an AOM CGH. The processing requires key information about the specific CGH device and measurement geometry, which is encoded in a “*.cgh” file provided by AOM. The user must also configure the data acquisition so that the measured data from the unit under test (UUT) is ready for subsequent processing in Morpheus™. This section of the manual will describe the user steps required to prepare the UUT measurement data for processing in Morpheus™.
Marking Fiducials in the Interferometer Software
Each CGH from AOM includes small marks known as fiducials that will be visible in the interferometer camera image. These fiducials allow Morpheus™ to align the coordinate frame of the measurement data to the coordinate frame of the design data stored in the .cgh file. The fiducials are uniquely located for each CGH and their exact positions are defined in the Final Design Report document sent to you by AOM with your CGH. To mark the fiducials in the measurement data, please refer to the instructions for your specific interferometer software provided below, or, if your software is not listed, refer to the manual for your software.
Marking Fiducials in Zygo Mx™ Software
The first step in preparing the measurement data is to mark fiducials in the Zygo Mx™ software. This is most easily accomplished by marking the fiducials before taking a measurement, although, it can also be accomplished post measurement.
Marking Fiducials Before Measurement
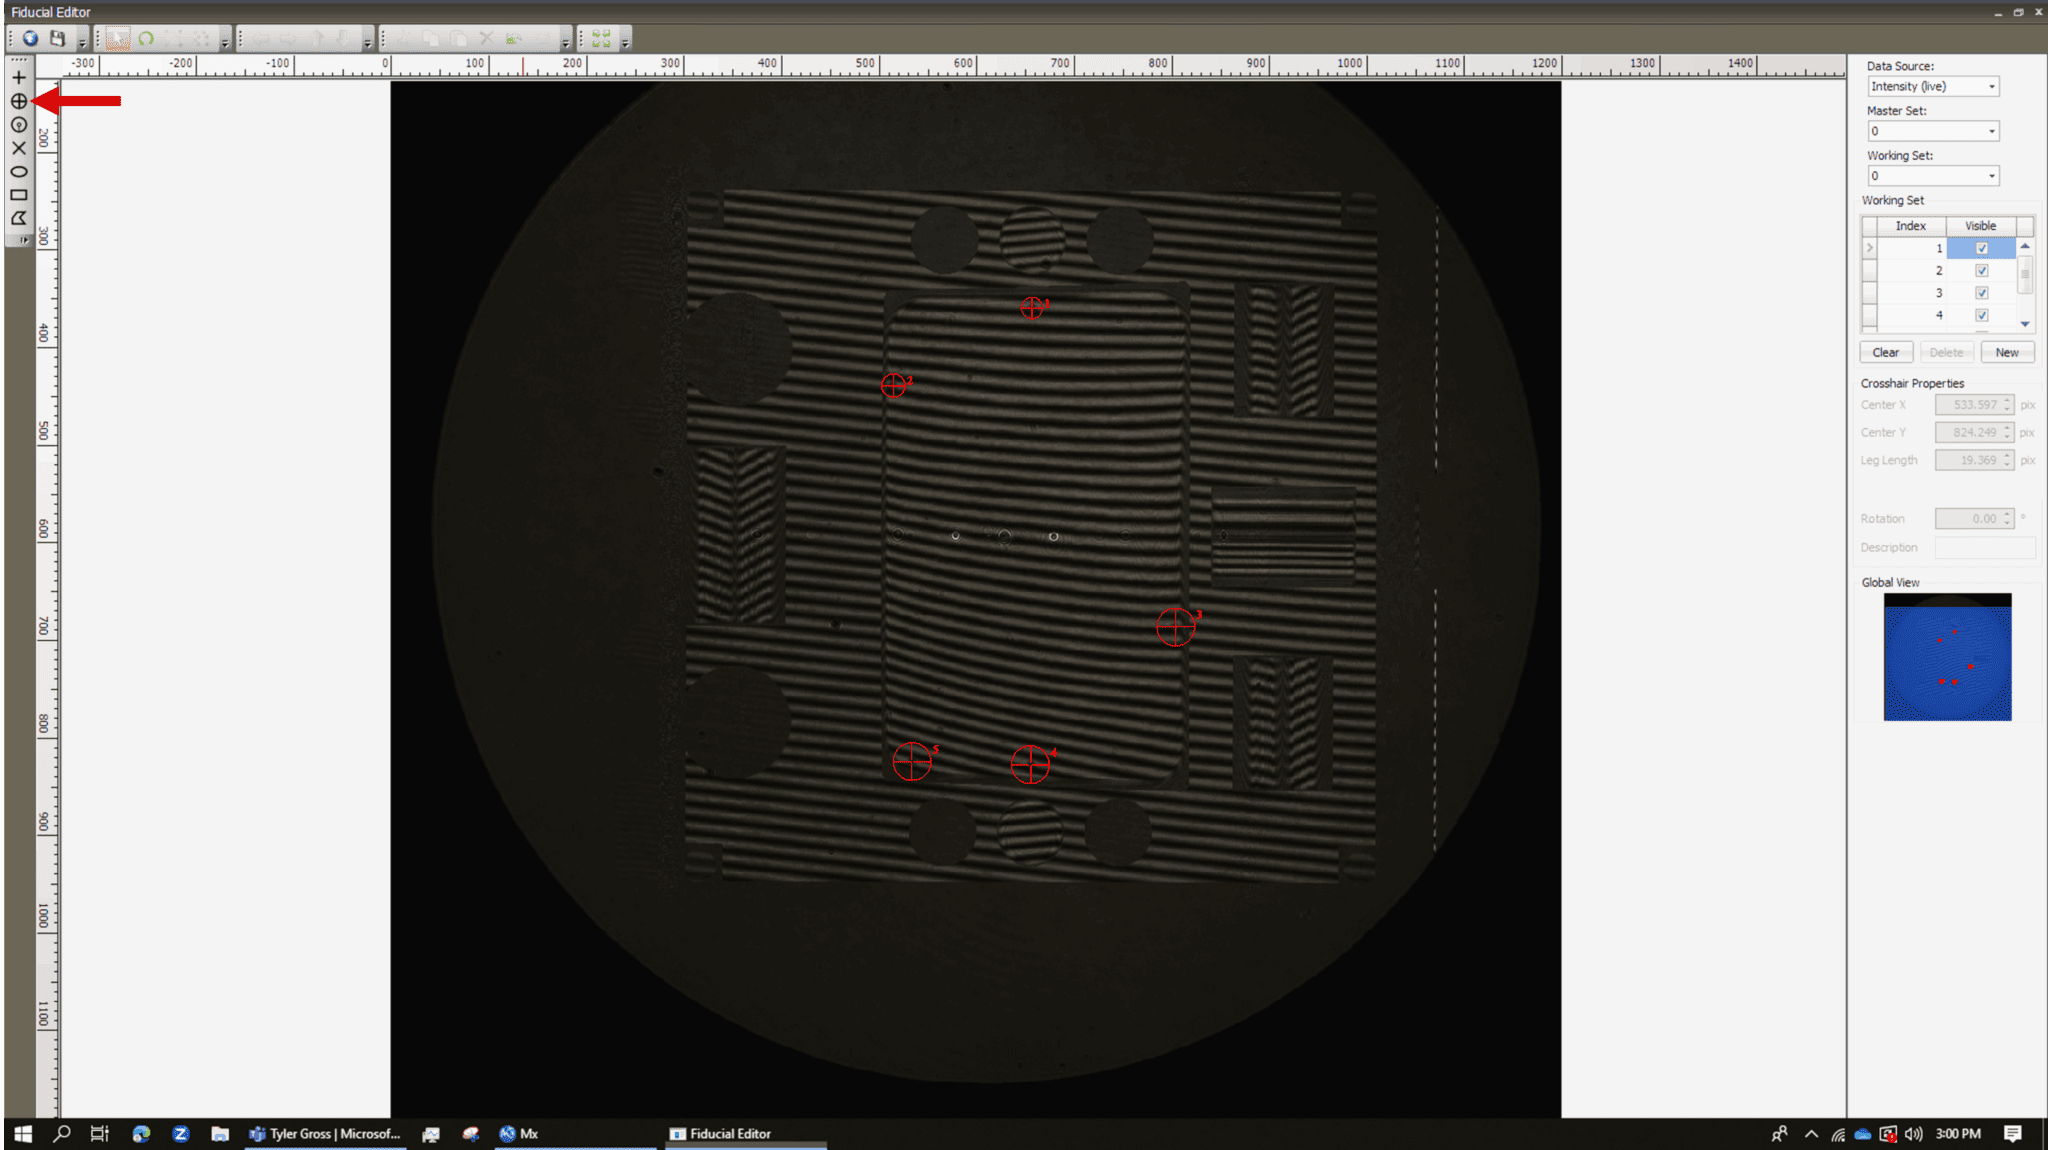
Before making a measurement, setup your CGH and test optic (UUT) as described in the final report document sent to you by AOM. Once you have aligned your CGH to the interferometer and the UUT to the CGH, you are ready to mark the fiducials. First, open the Zygo Mx™ software and select the Fiducial Editor from the toolbar. The Fiducial Editor is the icon with a circle and crosshairs. See below for the location of the tool.

Once the Fiducial Editor is open, you will see a window like the one shown below.

Select the ‘Intensity (live)’ option from the data source dropdown in the upper-right corner of the Fiducial Editor. At this point you should see the live interferogram data in the Fiducial Editor window. If you do not see the live interferogram data, please refer to the user manual for Mx for assistance.
Please evaluate if you can readily identify the fiducials at this stage. If you cannot, you may benefit from adding a small amount of tilt fringes to increase the contrast. This can be accomplished by tilting the reference optic on the interferometer a slight amount until the fiducials are all visible. You also should reference the Final Design Report sent to you by AOM for your CGH as a reference for where the fiducials are located on the substrate.

Once you can see all fiducials clearly, you are ready to mark their location. To do this, select the circle crosshair from the crosshair options on the left side. Then, click on the center of a fiducial in the Fiducial Editor window. You should see a small red circle appear at the location you clicked. Zoom in to assure accurate placement of your fiducial. If you do not see the red circle, please refer to your Mx user manual for assistance. Repeat this process for all fiducials on your CGH.
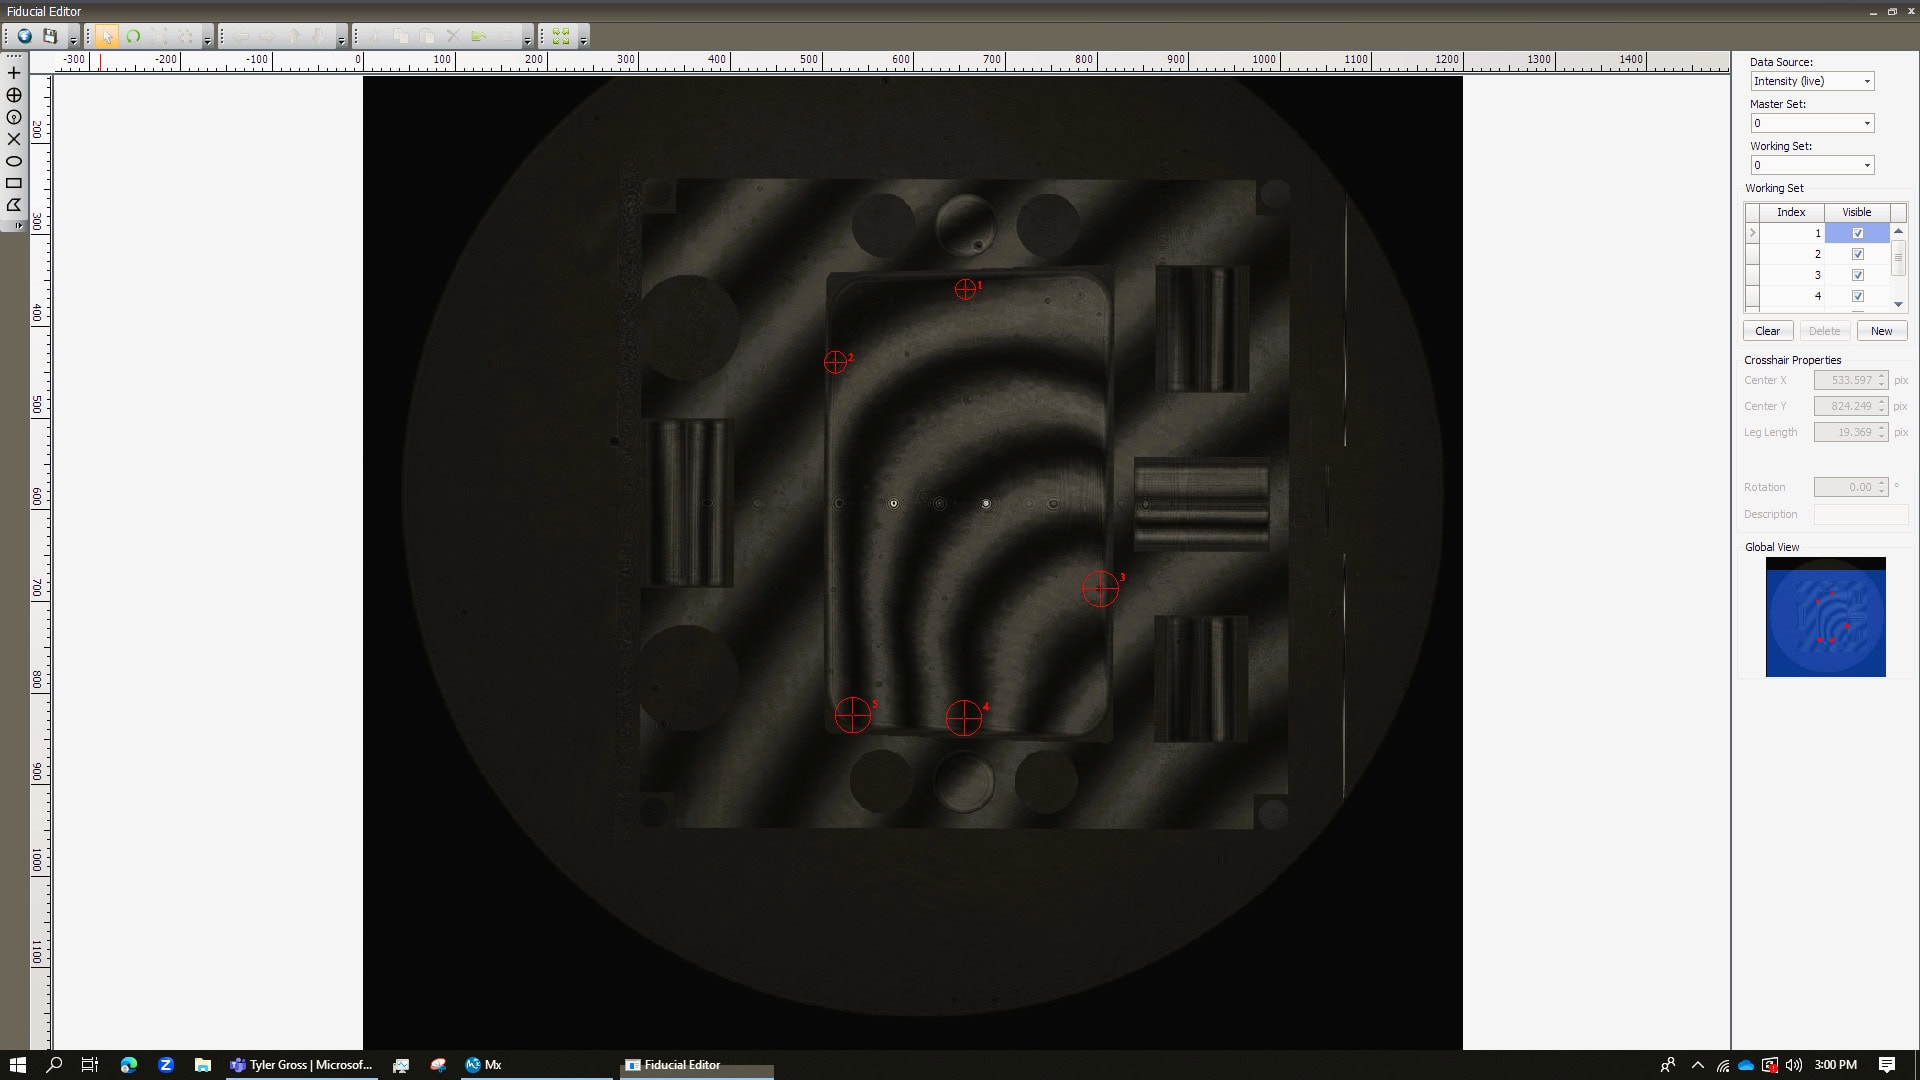
Once you have marked all fiducials, you can close the Fiducial Editor and proceed with your measurement. Fiducial locations will be saved with subsequent measured data files. Note, if you have added tilt to the reference optic to make the fiducials easier to see, you must remove the tilt and assure the test setup is accurately aligned before proceeding, see below for what the Fiducial Editor looks like when the test setup is realigned with fiducials marked. This is what your setup should look like immediately prior to collecting a measurement.
Please see the Saving and Exporting Measurement Data section below for details on how to properly export the measurement data for use in Morpheus™.
Marking Fiducials Post Measurement
If you did not mark the fiducials during the measurement process, you can still mark them post measurement. Follow the process described above for marking fiducials during the live measurement, but instead of selecting the ‘Intensity (live)’ option from the data source dropdown, select the ‘Intensity (file)’ option. You should now see the measurement data in the Fiducial Editor window.
Please evaluate if you can readily identify the fiducials at this stage. If you can see the fiducials, mark them, and resave the data set to include the fiducials (see Saving and Exporting Measurement Data below). If you cannot, you either may have to redo your measurement and follow the steps above in the Marking Fiducials Before Measurement section, or you can approximate the fiducial locations using the final report fiducial locations section as a guide.
Marking Fiducials in 4D Software
Coming soon.
Marking Fiducials in Other Software
For marking your fiducials in other software, please refer to your specific interferometer software manual. If you require further assistance, please contact AOM.
Saving and Exporting Measurement Data
Once you have marked your fiducials and your test setup is aligned, you are ready to save and export your measurement data. Do not remove any terms from the saved measurement data other than piston; this includes tilt, power, and astigmatism to name a few. Please be sure no terms besides piston are set to be removed when you take a measurement as well (see below for an example of only removing piston). Tilt will be removed from the measured data by Morpheus™ after applying mapping correction. Higher-order shapes will be fit by Morpheus™ during the evaluation of test alignment-induced errors.

If you have removed any terms and cannot deselect them for removal, you must complete a new measurement without any terms (other than piston) removed. Please refer to the specific software below for how to export your data for use in Morpheus™.
Next Steps
Once you have saved and exported your measurement data, you are ready to load it into Morpheus™. Please see the Loading Data into Morpheus section of this manual for details on how to load your data into Morpheus.